Get a front row seat, as photographers Katherine Keates and Avi Cohen recount their experience photographing the dramatic phenomenon of the wildebeest crossing Kenya’s Mara River. Flying hooves, clouds of dust, and cameras clicking; this is safari photography at its best! Katherine and Avi also recommend what you should stock in your safari camera bag.

© Katherine Keates
The Crossing
The Crossing
by Katherine Keates and Avi Cohen
Anxious repetitive chant like moans and explosive snorts reverberated through the African mid-day heat as restless hooves churned up clouds of reddish dust. An electric current of mounting tension and pending drama rippled through the air. We held our breath, cameras poised, in anticipation of the drama that was to unfold.

© Katherine Keates
Change of Mind
We had traveled for many miles over dusty trails of Kenya’s Masai Mara to reach this safari photography destination and to hopefully witness the most dramatic wildlife spectacle on earth. We had waited for hours in the blazing sun and furnace-like heat. The moment we had been anticipating was tangible yet illusive. When would they cross?
What we had journeyed so far to observe and photograph was the semi-annual crossing of the Mara River by the wildebeest, known as "Nyumbu Ya Montu" in Swahili and also referred to as the "Gnu". This event offers an unrivaled opportunity for safari photography. From the endless Serengeti Plains, over 1.4 million wildebeest, along with more than 200,000 zebras and gazelles, migrate clockwise over 1800 miles each year. They follow the rains in a constant search for fresh grass while being closely pursued by lions, cheetahs, wild-dogs and hyenas. These opportunistic predators patiently wait for the chance to strike on the weak, the young and the old.
An unrivaled opportunity for safari photography:
"From the endless Serengeti Plains, over 1.4 million wildebeest, along with more than 200,000 zebras and gazelles, migrate clockwise over 1800 miles each year."
After much careful and meticulous preparation, we had finally arrived. All we could hope for now was that luck and Mother Nature were on our side. From the crack of dawn, we had driven to and followed along the riverbanks. We observed thousands of wildebeest of all ages trudging along on their instinctual and endless pilgrimage in search of food and water. They arrived in long single columns from every direction forming slow moving tributaries of living creatures to gather at the river’s edge.

© Katherine Keates
Migration to the River
Not always can one predict where and when the crossing will take place simply by observing the flow of the gathering herd. All it would take is one or two gnus to spearhead a shift downriver to a more suitable crossing point. However, once there, the decision to cross could easily be reversed by a change of heart or the sight of a hungry crocodile along the shore. Then the entire entourage would once again change direction and the thousands would follow.
As we watched the herds gather along the riverbank, numbers built from both the flanks and the rear, pushing forward and creating a pressure cooker effect. Ground rumbling from stomping hooves, dust rising to obliterate all but the heads and horns, baying and calling of adults and calves all signaled the stampede about to occur.
All we needed to do was to be patient (an essential quality for safari photography!), because once the crowd becomes too congested and the oppressive heat unbearable, it only takes one brave wildebeest to take the first step into the water. We also knew that if the crossing place they chose was shallow, most of the herd would likely pass safely to the other side. However, if the water turned out to be deep, we might witness the water boiling with drowning wildebeest and slashing crocodiles. We could only wait.

© Avi Cohen
Leader of the Pack
Finally it happened! One tentative step from a bold individual and then, suddenly, without warning, the spontaneous and natural event took place. In the blink of an eye, the animals began to flow down the cliffs like water from an opened dam. Leaping and jumping, they entered the river, with only one mission in mind, to get to the other side … alive.

© Avi Cohen
The Jumping Duo
With hippos forming a blockade in the water to protect their young, the wildebeest were channeled into a restricted path of crossing. This slowed the head of the pack, causing a traffic-jam of panicked hefty animals clamoring and splashing over one another in a race for survival.

© Katherine Keates
Hippos on Guard
As the tension continued to mount and the pressure from behind increased, the more daring or desperate ones chose to either initiate new paths to the river or simply leap from mid-cliff to land on the backs of others. Once launched to mid-air we could easily see their oddly disproportionate physical design. Their box-like head sits on a muscular and heavily built front end followed by spindly legs and a slender hind.
With mud flying and water splashing, we watched and photographed successful crossers scramble up the bank on the other side. Thousands of exhausted wet-backed gnu were seen filling the horizon as they headed to greener pastures. Of the five thousand plus lucky wildebeest that crossed the Mara River before our eyes, not a single one was lost. That was a miracle, for often during these crossings, the opportunistic crocodiles get fed and many carcasses of not so lucky gnu can be seen floating down the river with the current.

© Avi Cohen
At the Edge of the River
Once the last straggler had safely crossed, we dropped to our seats in shear exhaustion. What had happened in the previous few minutes was photographic ecstasy — safari photography at its best. We had wanted to be prepared for any action at any minute. We had all our cameras prepared with lenses, extenders, and had charged batteries and flash cards close at hand. We each chose to have our back up bodies fitted with a different focal length lens in order to facilitate capturing both the wide scene and close ups without having to change lenses in mid action and also to avoid getting dust in the camera.
"Once the last straggler had safely crossed, we dropped to our seats in shear exhaustion. What had happened in the previous few minutes was photographic ecstasy — safari photography at its best."
With shutters blazing and expressions and expletives of "Oh my God", "I don’t believe my eyes", and other unmentionables, we shot like mad. We had zoomed, panned, and searched for the perfect composition while trying to take it all in with our eyes and our cameras.
As the dust gathered and rose in the turmoil, our auto focusing no longer functioned properly and manual focus became necessary. This meant steady hands in the heat of the moment. The use of bean-bag support became ever so critical. In a flurry of activity the interior of the Landrover had become a scene of flying objects, cameras, lenses, batteries, and flash cards. There was no time to waste. There was chaos inside and out.

© Katherine Keates
In the Dust
When it was all over, some of us wiping the tears from our eyes, we had a chance to reflect on what had just occurred. In twelve minutes of safari photography bliss, we watched over 5000 wildebeest cross the Mara River and each managed to shoot gigabytes of raw digital images in that short time. We knew our real work lay ahead of us back at the lodge with hours of editing, downloading and backups of these special images.
We headed back home while the wildebeest ambled off to graze the greener pastures of the Masai Mara as they have instinctually done for countless generations.

© Avi Cohen
After the Mara Crossing
We realized we had been fortunate enough to witness one of the world’s most dramatic nature stories, but one thing became incredibly clear. There is no beginning or end to the odyssey of Africa’s wildebeest, but rather the cyclical and never-ending search for sustenance. The only true beginning for the wildebeest is at the moment of birth.
What should be in your safari photography kit?

© Avi Cohen
Leaping Forward
In each camera bag:
- Camera Body (capable of high speed shooting: 5-8 frames per second)
- Back up Camera Body
- 100-400 mm zoom Lens with image stabilization
- 28-135 mm lens (or similar) with image stabilization
- 17-40 mm wide angle lens (or similar)
- 1.4X Extender

© Katherine Keates
Churning
Additional lenses and equipment (if you can manage it):
- 300, 400, or 500 mm f/2.8 lens (with image stabilization)
- Sturdy tripods
- Solid, quality tripod ball heads
- Cable release

© Avi Cohen
At the Crossing Point (Close Up)
Electronic Accessories:
- Quality batteries (lots!)
- Battery chargers
- Flash Cards (many!)
- Flash Card readers
- Portable hard drives for storage and backup
- Laptop

© Katherine Keates
Piling Up
Additional safari photography necessities:
- Safari style bean bag (essential for wildlife photography)
- Large chamois (to cover camera for dust/rain protection)
- Clear plastic bags (for additional protection)
- High energy power bars (for long waits, you will need it !!)
- Sun protection and hat
- Water, water, water

About Katherine Keates and Avi Cohen

Photographers for many years, Avi’s and Katherine’s love of photography has led them to explore many avenues in the art and craft of photography both at home and abroad.
As involved members of numerous photographic organizations, they enthusiastically support and encourage amateur photographers of all levels. These award-winning photographers have taught workshops, presented instructional programs and have led photographic excursions to Africa, Israel, Jordan, and South America in order to promote the art and sheer enjoyment of photography.
They encourage you to explore their unique perspectives of the world found in the images on their individual websites:
www.avicohenphotography.com
www.katherinekeatesphotography.com

© Avi Cohen
Diving Into the Water
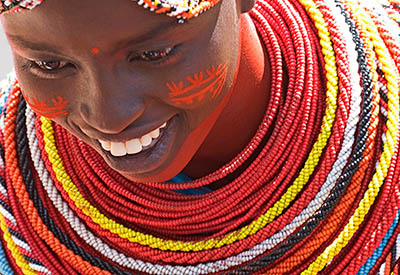
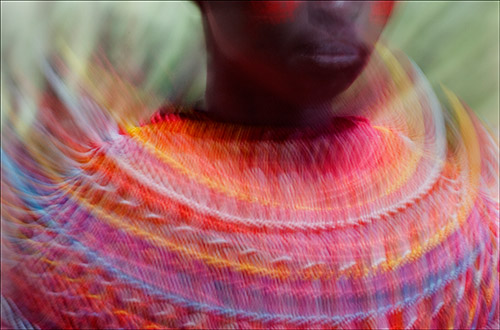
If you enjoyed this safari photography adventure, you may want to read Africa Dance, another article by Katherine in which she explores Samburu tribal dances through a series of stunning, selective focus and long exposure photos.