Take a Peek Inside My Camera Bag!
I find it interesting to know what other photographers are using in the way of gear, as well as in the digital darkroom. Sometimes I come across an idea I haven’t seen before, and I learn about a new tool that can help me in my craft. I thought I’d share what camera, lenses, accessories, hardware, software, and of course toys, I use, in case it helps any of you. Along with each item of professional photography equipment, I’ve included a brief and informal review of what I like (or sometimes don’t like) about it.
Professional Photography Equipment Index
Cameras and Lenses
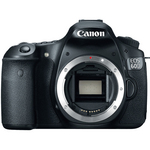
Canon EOS 60D DSLR Camera
Before I moved up to the more profesional photography equipment of the 5D Mark II, I owned the Canon 40D, which is an older generation of the current Canon 60D. I had no complaints with the camera. It was my trusty sidekick for a good few years. If I hadn’t wanted higher quality images for stock and print-making, I would have had no reason to move up.
Note that Canon has repositioned the 60D out of the semi-pro market. In particular, they have changed to a plastic body from the old magnesium alloy. Thus the 60D is not quite a continuation of the old X0D line. Nevertheless, this is a great camera for the serious amateur looking to move up from the Rebel. This is an 18MP camera with a 1.6x crop factor. It has good picture quality, and handles noise well up to about ISO 800. The new addition in this model is, of course, video.
back to the index of professional photography equipment
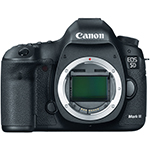
Canon EOS 5D Mark II Digital Camera
I’ve now moved up from the X0D series to more professional photography equipment. I love my Canon 5D Mark II! It has a great compact shape for a full frame camera, compared to the clunkier 1D series. That’s great for me, since I’m not too keen on lugging around pounds and pounds of gear.
The sensor was a big selling point for me. It’s got amazing picture quality. When I was shopping, I was comparing it to the Canon 7D. Since I don’t really need the faster frame rate offered by the 7D (most of what I shoot doesn’t move, so I’m typically on a tripod), that was not a factor. However the 7D was appealing because of the price, and I didn’t mind the 1.6x crop factor that it has. What convinced me to get the 5D Mark II in the end? Besides the glowing reviews from my colleagues who own this camera, it was a review I found online that placed images shot with each camera at various ISO settings side by side. The difference was marked. I was sold by the clearly superior picture quality of the 5D Mark II. Since I’m selling my images, quality is important to me.
From what I hear, many videographers are loving the Canon 5D Mark II for its great video capabilities. This is an added bonus for photographers, as the industry embraces video more and more.
Note that the 5D Mark II is also sold as a kit with the 24-105mm f4 L lens. That’s a lens I have in my bag. See my review below.
The Canon 5D Mark III is now available. It’s too soon for me to make a switch, but I’d love to get it for the better handling of noise at high ISO. That would be useful for all the night photography I’m now doing.
back to the index of professional photography equipment
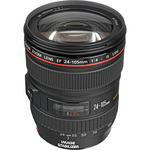
Canon Zoom Wide Angle-Telephoto EF 24-105mm f/4L IS USM Autofocus Lens
I used to own the Canon EF 28-135mm f/3.5-5.6 IS Image Stabilizer USM Autofocus Lens as my lens in this focal range. For around USD$440, its a good "walking-around" range. However, I found that the image quality wasn’t what I required. I did a side-by-side comparison with my other lenses (at the time, my 100mm macro, my 70-300mm DO, and my 16-35mmL) shooting at f/8, and setting the lens at a variety of focal lengths (28mm, 100mm, and 135mm), and found it to be noticeably softer than my other lenses in every comparison. That’s not unexpected, given the quality of the other glass. It did let me know that it was time for me to upgrade!
Canon 24-105mm
I replaced that lens with more professional photography equipment in the form of the Canon 24-105mm f/4 lens that comes in the 5D mark ii kit. It’s perfect for my kind of shooting (mostly on a tripod, shooting landscapes, and "details"). The other option in this range is the
Canon Zoom Wide Angle-Telephoto EF 24-70mm f/2.8L USM Autofocus Lens which is another fantastic lens. For my purposes, I traded off the fast f2.8 of that lens (less important to me, because I’m typically on a tripod) to have the bit of extra focal length. Either lens is terrific; your choice depends on what kind of shooting you do. If you photograph a lot of people, street photography, or motion in general, you’ll probably prefer the faster glass of the 24-70mm.
I did find a number of negative reviews on the Internet that debated whether the 24-105 was really professional photography equipment worthy of the L-Series rating. From what I could tell, there were some problems with specific lenses early on, which Canon rectified with replacements, and it may be that the bad reputation stuck. I’ve seen plenty of excellent reviews of the lens, and I’m delighted with mine.
back to the index of professional photography equipment
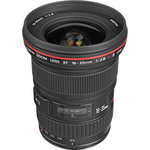
Canon EF 16-35mm f/2.8L II USM Autofocus Lens
I bought version I of this lens (it was upgraded to a "II" lens in 2007) when I still had a camera with a 1.6x crop factor. With the full frame 5D Mark II, I now enjoy the full effect of the wide angle. The glass is excellent professional photography equipment quality, and the quick and quiet AF makes this a fabulous lens. You won’t be disappointed.
back to the index of professional photography equipment
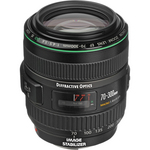
Canon EF 70-300mm f/4.5-5.6 DO IS USM Lens
I love a telephoto! I use a long focal length a lot. What I don’t love is lugging a heavy lens with me as I hike up hills for hours at a time to get the shot! I thought long and hard about what lens to get in the telephoto range. Canon has some beauties. My shooting partner of many years had the big, white Canon Zoom Telephoto EF 100-400mm f/4.5-5.6L IS (Image Stabilizer) USM Autofocus Lens and I was spoiled for a while to be able to have him carry it, while I borrowed it when I wanted to! If you’re not fortunate enough to have your own camera sherpa, then you may want to consider doing what I eventually did. I acquired the 70-300mm DO lens. DO lenses are marked with a green band around them, instead of the L-series red band marker. DO stands for "diffractive optics." From Canon’s description:
The use of Diffraction Optics allows a lens to be shorter, lighter, and of higher image quality than comparable normal optical systems of the same focal length and aperture-while this lens is heavier than the consumer-grade EF 70-300mm f/4-5.6 IS USM lens, it is 28% shorter and uses Canon’s very best ring-USM motor instead of the lighter, slower, and less costly ‘micro-USM’ motor.
Beyond savings in mass, the DO lens performs admirably at its maximum aperture, with images that are very comparable to the "L" series telephotos. It has a circular aperture diaphragm to help create natural out-of-focus highlights, and its built-in image stabilizer allows you to handhold the lens at shutter speeds 3 steps slower than would otherwise be possible.
I have been very happy with this compromise. My 70-300mm lens is about the same physical length as my 16-35mm, although the barrel is bulkier. In my lens tests, I’ve found the image quality to be excellent. For those of you who can’t, or simply don’t want to carry around a heavy lens, I recommend you take a look at this one.
back to the index of professional photography equipment
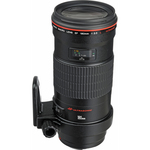
Canon Telephoto EF 180mm f/3.5L Macro USM Autofocus Lens
I shoot a lot of macro images, and in moving to a full frame camera, I felt I’d really miss the apparent magnification of the crop sensor if I stuck with my old 100mm macro lens. Although the "magnified image" is still there within the full frame image — you just have to crop out the center to achieve the same thing — it’s very hard to pre-visualize such an image, and I’d prefer to have all my megapixels devoted to the close-up section that will be my final photo. That meant I had to bite the bullet and abandon my long-loved and previously favorite lens, my 100mm macro, in favour of a 180mm macro. Suffice it to say that I have a new love in my life now! The 180mm macro is a fabulous lens. It’s definitely serious professional photography equipment, often used by doctors to photograph medcal images. The quality is excellent, it’s tack sharp, and it works very well for the selective focus style of shooting I use. Although the minimum aperture is 3.5, not 2.8 like my old 100mm lens, the extra focal length means that I can still get the soft focus look that I love in my selective focus images.
back to the index of professional photography equipment
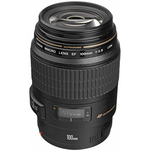
Canon Telephoto EF 100mm f/2.8 USM Macro Autofocus Lens
Although I didn’t have the 100mm L-series (Canon EF 100mm f/2.8L Macro IS USM Lens), for 60% of the price, this macro lens produced excellent quality images for me for many years. Being a fixed focal length, the glass was good and gave me very sharp images. The f2.8 aperture gave me the soft look I love in my selective focus images. Until I acquired the 180mm macro lens, this one was a favorite of mine, and probably my most-used lens. I have no hesitation whatsoever in recommending it.
back to the index of professional photography equipment
Camera Care and Transport
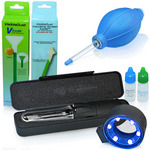
Visible Dust Ultra Sensor Clean Arctic Butterfly 724 (Super Bright) Bundle for 1.6x (16mm) Sensors
I hate spending hours of painstaking work in post-processing to remove dust spots, so when someone at a photography tradeshow pitched me on the Visible Dust arctic butterfly and sensor loupe, I decided to give it a try. I have been very pleased with the results. The sensor loupe lets me clearly see where the dust spots are on my sensor. No more cylce of guess-work: clean, take test shot of blank wall, download image, view at 100%, and then repeat several times. Now it’s easy to see when you’ve got it all. I also really like the brush, which uses static charge to attract the dust spots, and pull them off the sensor. The brush won’t work for the sticky dust that you sometimes get, but this kit also comes with a swiper and cleaning fluid to take care of that too. This system works well for me.
back to the index of professional photography equipment
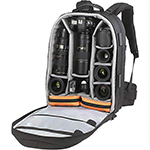
Lowepro CompuTrekker Plus AW Camera Backpack
I originally got this backpack because I travelled a lot for my IT job. I wanted to be able to take my laptop with me on the plane, along with all my camera gear in case I got a few moments away from the job to photograph. Of course, I wanted to take it all as carry-on. This backpack works well; there’s lots of room for your camera and lenses inside, and the padded cells are customizable by moving around the dividers, which are attached with Velcro. There’s also a padded slot for your laptop to slide in, so it fits between your back and the camera gear when you carry it. The "AW" (all-weather") designation means that the pack also comes with an all-weather cover. Finally, a must-have for me, there’s a padded waist strap so that the weight will sit on your hips rather than your shoulders — a must for long treks through the airport!
I’m no longer traveling for an IT job, but I still use the backpack all the time in my own business. When I travel for a photo shoot, it’s great to be able to take along the laptop to download images. I also use the pack when I’m giving presentations, and need the laptop for that, and the camera gear for giving a demo.
back to the index of professional photography equipment
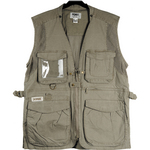
Domke Photo Vest
There are many professional photography equipment systems out there for carrying your gear: belts, packs, slings, and vests. After looking into a few, I settled on this vest. I like to go hiking with my camera gear, and take pictures along the way. What I like best about the vest is the accessibility of my equipment. I keep my camera around my neck (I have a strap that distributes the weight well), and everything else in the vest pockets. That includes my lenses, filters, spare batteries, cable release, and even snacks and water. It’s very convenient. I always disliked hiking with a backpack. When I came upon something interesting to photograph, I’d have to drop the pack, open it up, and find what I wanted. By then, I might have lost the photo opportunity. With the vest, I know exactly where to reach to get what I need, and I can do it quickly.
There are a couple of waterproof pockets at the front, and a couple of zippered ones as well, so you can keep things like your car keys safe from slipping out. As an added bonus, it’s machine washable.
back to the index of professional photography equipment
Close-up and Product Photography
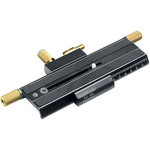
Manfrotto Focusing Rail
(aka Manfrotto 454 Micrometric Positioning Sliding Plate)
A focusing rail is fairly specialized closeup professional photography equipment that can be enjoyed by the serious amateur as well. This rail is a recent acquisition for me, so I’m still getting used to it. So far, I like it a lot; it gives me much more control when I want to get in closer to my subject. Instead of trying to move my tripod legs just a hair (without losing my composition altogether), or attempting to move the subject closer (not always possible), I can fine-tune my position by sliding my lens a touch closer or further using this plate. I’m guaranteed to only move in one dimension, and not slip a bit from side to side.
In the future, I can see buying a second plate, and mounting them together so that I have this control separately in each of two directions, not just one.
This particular rail seems to give good value for money. Some of the rails are much more expensive. This one meets my needs without breaking the bank.
back to the index of professional photography equipment
Kenko Extension Tubes
If you love closeup photography, you need to own a set of extension tubes! They are not too expensive (certainly not when compared to the cost of a macro lens), because they contain no optical elements. Their purpose is to move the focal plane of the lens further from the sensor, which allows you to focus on a closer subject, thereby achieving greater magnification. The tubes usually come in a set of three, each of a different length. They can be used individually, or stacked together.
You can use the tubes as a way to try out closeup photography by adding them to one of your existing lenses to make it close-focusing. You can also stack the tubes with a macro lens for even greater macro capability.
I use these tubes made by Kenko. They make versions for the different camera mounts (Nikon, Canon etc). They do preserve the electronic connections, so automatic focusing and metering still work.
Given how much I love macro photography, these are a must have for my kit!
back to the index of professional photography equipment
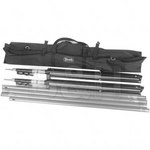
Photek Background Support System
I use the Photek background support system as my portable backdrop stand. It is great professional photography equipment for your own studio, or to take with you on location. It is quick and easy to set it up and take it down. There are two stands that operate the same way as your typical light stand, and then a pole that runs between them. The pole is composed of four 3-foot segments that can be used to create a width of 3, 6, 9, or 12 feet. Your backdrop material hangs from the pole. The whole set up is very stable. The system also comes with a robust canvas carrying case that holds all the parts, making it truly portable. This is good value for money.
back to the index of professional photography equipment
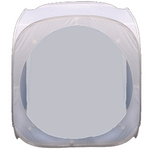
Interfit Pop Up Photo box
A "photobox" is a cube with translucent sides. You put items inside that you want to photograph. The sides act as diffusers, giving you a soft, even light. It’s great for doing product photography, and I use it all the time to photograph flower closeups in the studio.
I actually use the Cameron Photobox, which includes a blue, a green, a white, and a gray backdrop. The top and front are removable (as a unit). The Cameron box seems to be hard to find these days, so I’ve linked here to the Interfit version, which looks very similar, and comes in a few different sizes. The large 48" cube comes with a black and a white backdrop cloth, while the 36", 24", and 20" models come with a removable blue backdrop cloth.
back to the index of professional photography equipment
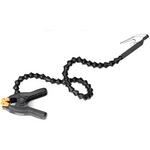
Wimberley Plamp
You’ll have to decide for yourself whether or not you can use a "plamp." Plamp is short for plant clamp. The idea of this tool is that you can clip one end to a table, or your tripod leg, and the other end holds onto a plant step to hold it steady in the position you want. The articulated arm in between can be twisted to any position you wish (although it is quite stiff, so fine adjustment in difficult). The arm is about 2 feet long, and comes with an optional 1 foot extension.
If you’re trying to use the plamp in the field, it may be even more useful for holding things out of the way. It will hold a stem, but you must be careful because the plastic grip can easily bruise a delicate stalk. Also, if it’s windy, the plamp may hold the stem, but the flowerhead can still move in the breeze! I don’t use it all the time, but every once in a while, it’s exactly what I need.
back to the index of professional photography equipment
Photography Filters
These days, many filters can be added in post-processing, and it’s no longer necessary to carry them in the field. There are a few, however, that you must use at the time of shooting, because you cannot create the effect after the fact.
Professional photography equipment includes quality filter brands such as B&W, Zeta (the top of the line filters by Kenko, who bought Hoya), Schneider, Rodenstock, and Heliopan.
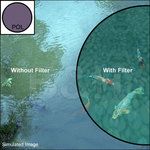
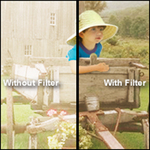
Circular Polarizing Filter
The circular polarizing filter cuts reflections, including those caused by water droplets in the sky. This means it can darken skies, making them more blue, and cut surface glare from water, allowing you to see beneath. Technically, what the lens is doing is filtering out light that is polarized perpendicularly to the axis of the filter. You can rotate the filter while it’s attached to the lens to adjust the degree of polarization.
back to the index of professional photography equipment
Neutral Density Filter
A neutral density filter is a uniformly gray filter that blocks out one or more stops of light, without changing the colors of the image. It is useful when you want to slow down your shutter speed or open up your aperture more than the current lighting conditions would permit, for example when photographing a waterfall.
back to the index of professional photography equipment
Graduated Neutral Density Filter
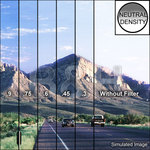
Graduated neutral density filter
A graduated neutral density filter is usually gray at one end, fading to clear at the other. Like a regular neutral density filter (see above), it also blocks out one or more stops of light in the gray area, without changing the colors in the image. It is useful for shooting landscapes where the sky is much brighter than the foreground. The soft transition line of the filter can be placed so that it lines up with the position of the horizon. The filter reduces the overall dynamic range of the image, so you can avoid blowing out highlights and blocking up shadows at the same time.
back to the index of professional photography equipment
Best Camera Accessories
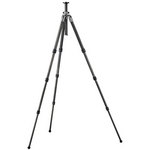
Gitzo Tripod
Gitzo is known for making professional photography equipment, and I love my Gitzo tripod. It’s made of carbon fiber, which keeps it light for me to carry around, yet it’s still solid and stable. They don’t make my model any more, but there are many new ones to choose from. Some factors to consider when picking yours include:
- Choose the right height. You should be able to easily raise your camera to your own eye level; tall people sometimes need a tripod with extra height.
- Find a tripod that supports at least the weight of your camera plus heaviest lens.
- Decide whether you want a rapid center column to quickly give you an extra boost of height.
- Don’t forget to check and how low to the ground you can support your camera. It’s easy to focus on the height, and forget that sometimes you want to be right at ground level. Tripods with a centre post sometimes don’t go as low as you’d like.
- Decide how many leg sections you want. Mine has three, which is all I’d want. At four, I worry that I’m starting to lose stability.
back to the index of professional photography equipment
Gitzo Ballhead
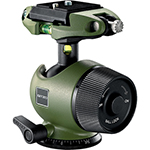
I also love my Gitzo ballhead! I have an old-school Gitzo centre ballhead. Once again, my model is no longer available, but the replacement ones are no doubt even better. When you’re looking for a tripod head, pay attention to the weight capacity of the head, and whether or not it has a separate locking control for panoramic rotation (very useful).
back to the index of professional photography equipment
Manfrotto Quick Release
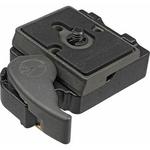
Years ago, before I had a Gitzo tripod head, I had a Manfrotto one. At the time, I also invested in the Manfrotto quick release system. I kept it when I switched to Gitzo, and have always liked it. I’ve seen other release systems that don’t look as "quick" to me! Some of them have you slide the camera onto a rail and lock it down. I really like my Manfrotto release because I just clip the camera in and go. There’s a little locking pin that you can flip across to make sure it’s secure, but it’s super fast to use. I can clip in and clip out in a second.
back to the index of professional photography equipment
Acratech Spirit Level
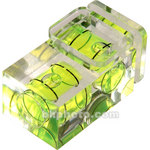
I always prided myself that I could tell if I had the horizon straight when I was shooting, however, many of my pictures told a different story! Sometimes a tree that’s been bent by the wind, or some tricky angles in the landscape, can throw off your perception. This little gadget might seem a bit pricey, but it’s a lifesaver. No more crooked horizons! I use it all the time. It slips right into the flash hotshoe on top of your camera, and its double axis bubbles let you check both horizontal and vertical alignment simultaneously.
back to the index of professional photography equipment
Photoflex LiteDisc
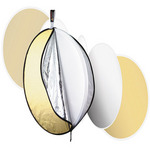
What photographer can live without a reflector and diffuser? Well, perhaps if you’re just photographing landscapes, you use the clouds as your diffuser! Otherwise, professional photography equpiment for shooting people, products, and close-up nature nearly always includes reflectors and diffusers. The size you need depends on the size of your subject.
It’s easy to make your own, however, the do-it-yourself kind tend not to be too portable. These ones for Photoflex are great because they fold up and pack small. The have a variety of sizes and colors, including their popular 5-in-1 version shown here. I have a set I’ve made myself and use in my home studio, but I still own the Photoflex folding kind so that I can take them on location.
back to the index of professional photography equipment
Fun Photography Toys
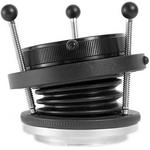
If you haven’t heard of a lens baby, you owe it to yourself to check it out! Much cheaper than the glass of a high quality lens, it’s made for being creative. The idea behind it is that there’s one sweet spot of sharp focus in the image, with graduated blur of everything around. You can move that spot of focus around by bending (yes, bending!) the lens, or twisting it, depending on the model. You can find out more about them on the Lensbaby website. They provide a new challenge, a new way of seeing, and endless hours of fun.
I have the a Lensbaby from the "Control Freak" series depicted here (I can hear my friends saying "How appropriate!" right now…). I use mine all the time, in combination with the 4x and 10x close-up filter macro kit that comes as an optional extra.
Be sure to check out the Composer, Muse, Transformer and Scout series as well. Each one has its own interesting twist, from fisheye to tilt-shift (for certain camera mounts only). Such fun toys!
Note that the Lensbaby comes in different versions with mounts appropriate for your brand of camera. They are currently available for Canon, Nikon, Pentax, Sony, and Olympus 4/3rds SLR camera lenses.
back to the index of professional photography equipment
Pinhole Body Cap
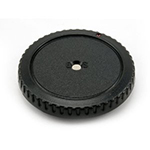
Have you ever wanted to explore pinhole photography? How about if you could adapt your digital SLR camera to be a pinhole camera? Well, you can. I discovered a pinhole body cap that does just that. It fits over your camera’s lens mount just like the plastic body cap you got with the camera originally. However this cap has a built in pinhole. The instructions will tell you what focal length and f-stop it’s rated at (mine is 50mm, f/227). This one from Lenox Laser is available for Canon, Nikon, Olympus and Pentax mounts.
If you’re in Canada, you can also look for the Rising brand pinhole ‘Lens’ Obscura Adapters.
back to the index of professional photography equipment
Computer Hardware and Software
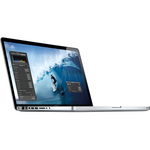
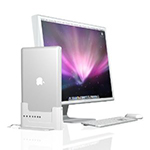
These days, professional photography equipment extends beyond the realm of cameras and lenses into the world of computer hardware and softare. I recently made the switch from the PC world to the land of Apple, and I’m quite happy with my choice! I debated for a long time between getting an iMac desktop and a MacBook Pro laptop. In the end, I chose the laptop, since I do a lot of presentations, and need a portable computer for those. In addition, I really couldn’t stand the glossy screen of the iMac. I found the glare very distracting, and didn’t think I could live with it for my picture editing. I chose the 15" antiglare screen for my MacBook Pro, and got an external monitor and keyboard so I can use it like a desktop when I’m in my home office. Because the on-board hard drive is a little small, I also got a 2TB external hard drive to hold my Lightroom catalog and all my photos. Since I typically do my photo editing in "desktop mode," this works out fine. I just plug in the hard drive while I’m in the office.
back to the index of professional photography equipment
Since I frequently switch between laptop mode and desktop mode with my MacBook Pro, I really wanted a docking station so I could just plug my Mac in and pull it out without having to fiddle with all the cables every time. Apple still doesn’t make docking stations for their laptops, and for a long time there wasn’t really a good third party solution. Collective internet wisdom guided me to Hengedocks, and I’m very happy with the result. It took a little tweaking at the start to get the cables seated properly in the dock, but once I got past the initial setup, the dock worked like a charm. I pull my laptop in and out several times a day wth no problems. At just under USD$75 (for the 15"), The cost is very reasonable, too.
back to the index of professional photography equipment
Dell UltraSharp U2410 24-inch Widescreen LCD Monitor
My Sony Artisan CRT monitor was getting old and tired, and I figured it was time to make the move to a new LCD monitor. After doing my homework on the internet, I came up with the Dell UltraSharp U2410 24-inch Widescreen LCD High Performance Monitor with HDMI, DVI, DisplayPort and HDCP as my monitor of choice. It works with both Mac and PC (make sure you use the menu to adjust the color settings for a Mac, as they default to PC). The color is rich, the image is sharp, and the matte screen has no glare. I’m really happy with this monitor. I’ve been able to calibrate it successfully with my Spyder software.
back to the index of professional photography equipment
LaCie Hard Drives
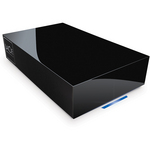
What photographer doesn’t need extra hard drives? I have quite the setup with my system. My Mac hard drive is backed up using Time Machine to an external drive. My main photos drive is also an external, which gets backed up to yet another drive (a NAS drive in this case). I’ve found La Cie drives perform well and are reliable. I own two of them.
back to the index of professional photography equipment
SanDisk
ImageMate All-in-One USB 2.0 Reader
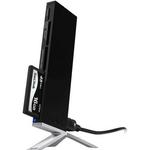
If you shoot a lot, you definitely want a card reader so that you can speed up the process of downloading images from your camera to the computer. I can’t imagine having to cable my camera to the computer every time and use that slow connection. With a card reader, you just plug your card into the slot, and boom! Your images start downloading. You can configure the software that will open when the card is inserted; for me, it’s Adobe Lightroom. I use a slightly older model of the Sandisk reader depicted here, and it’s great. It reads all card formats.
back to the index of professional photography equipment
Wacom Tablet
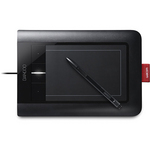
I am addicted to my Wacom tablet, and I couldn’t process images without it. It took a little getting used to at first. I pushed myself over a few days of intense editing to use only the pen tablet, and by the end, I was hooked. After using the pen, the mouse feels cumbersome and clunky compared to the fine control I have with the pen.
I do find that I like it better when I use the in "mouse mode" so that the positions on the tablet are relative, rather than being mapped directly to the screen. That will be up to you to test out, but you do have the option.
I use the old Graphire4 model from Wacom. The Graphire line has since been replaced by Bamboo, so take a look at those. For professional photography equpiment, also consider the more expensive Intuos line, which may suit your needs. The 4"x5" size is recommended for use with laptops. It’s more portable, and is good for laptop-sized or smaller screens. The 6"x8" is recommended for desktops. I actually use the 4×5 size with my desktop and larger screen, but that may be why I prefer to use the pen in "mouse mode." The Wacom tablet definitely makes my "can’t live without it" list.
back to the index of professional photography equipment
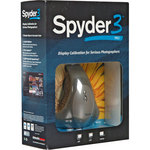
Datacolor Spyder3Pro Display Calibration System
If "calibrate monitor" is still on your todo list, it’s definitely time to get yourself the right tools. Monitor calibration is essential if you edit your images. After all, if you are playing around with the colors, how do you know what they are supposed to look like if you don’t know that your monitor is displaying colors in a standardized way?
I’ve been using the Spyder 2 to calibrate for years now. The new and improved Spyder 3 has since come along to replace it. It works through a device that is placed on your screen to read red, green, blue, and gray color values produced by the accompanying software program. Based on the readings, the software creates a color profile for your monitor that then gets loaded when you boot your computer. You need to repeat the process every few weeks, which is why it’s good to own your own calibration device.
back to the index of professional photography equipment
Adobe Photoshop Lightroom
I’m a big fan of Adobe Lightroom software, and have been using it since one of the earliest versions. There are a couple of different scenarios for which Lightroom makes a good choice.
If you’re a pro, you’ll love the catalog organization, and keywording capabilities in Lightroom. There are also great tools for rating and color coding your images, as well as comparing images side by side to select your best shot from among many similar ones. You’ll enjoy the ability to generate a customized website to show selects to customers with a few fill-in-the-blanks and one click. You can do your printing right from Lightroom, too.
If you’re just starting out, and are looking for an excellent photo editor that covers all the basics, and then some, Lightroom is a great choice. It’s less complex that Photoshop, but has all the ability of a good RAW editor to manage exposure, plus some quite sophisticated tools for adjusting color, dust spot removal, lens correction, sharpening, black and white conversion, and much more. In each version, the tools get a little more sophisticated, and Lightroom now has the ability to do many local corrections as well as the global ones. In addition, you get all the great features mentioned above that a pro would want. The file organization, printing, and web capabilities are valuable for photographers at any level.
back to the index of professional photography equipment
Adobe Photoshop CS5
If you’re looking for more sophisticated editing than Adobe Lightroom provides, Adobe Photoshop CS5 is the answer. I use it in conjunction with Lightroom for those images where I want to do something extra. It works seamlessly with Lightroom; you can open an image from Lightroom into Photoshop, make your changes, and have the resulting file automatically saved back into the Lightroom catalog. From a creative standpoint, there’s not much you can’t do with Photoshop. If you think of something, there’s probably a third party plug-in for it! I’m a regular (daily!) user of Photoshop, and can’t live without it.
back to the index of professional photography equipment
Return to Basic Digital Photography from Professional Photography Equipment
