Cropping Photos
Cropping photos refers to removing parts of the image to emphasize the subject and remove distractions. What you choose to include in your image declares what you want to call attention to.
Tip
The aspect ratio of an image is the ratio of the width to the height. Most DSLR cameras have a 3:2 aspect ratio.
Cropping pictures can be done in camera, but also in post-processing. Of course, it is always desirable to get as close as you can to the final image in camera, but there’s nothing wrong with cropping photos after the fact. There’s nothing sacred about the aspect ratio of your particular camera format. You should crop your photograph to the best advantage of the image.
Cropping Pictures: In or Out?
When we look around the scene with our eyes, we can take in a vast area. We can see ahead, and to the sides; up and down; our peripheral vision extends that range of sight quite far. Making a photograph involves selecting a bounded area out of the whole scene. Where you choose to place the boundary of the image frame is significant. And what you choose to leave out of the frame is just as important as what you include. When cropping photos, make sure that you only include elements within the frame that contribute to your story, and don’t distract from it.
In the image below, I’m photographing fishermen on a bridge in Istanbul. But where is the real interest in this picture?
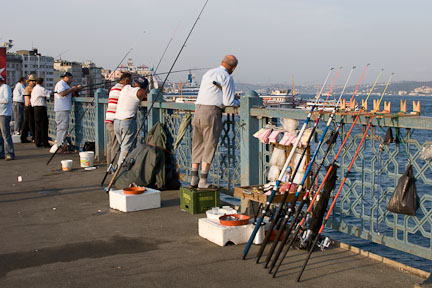
Version 1
© Julie Waterhouse Photography
To me, it’s the gentleman whose pants are too short, and who is so short himself that he needs to stand on a crate! It’s better to crop tighter to eliminate the non-essential elements, and leave just enough to tell the story.
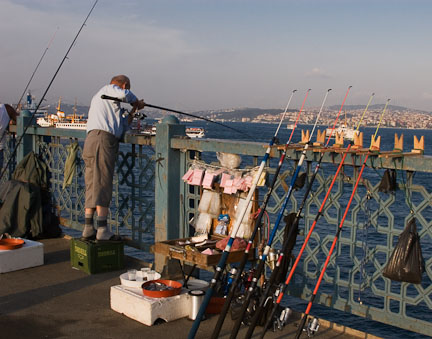
Version 2 – a tighter crop
© Julie Waterhouse Photography
Cropping Pictures: Horizontal or Vertical?
Most novice photographers tend to always shoot with their camera held horizontally, producing pictures in landscape format. Sometimes it’s better to hold the camera vertically, and shoot in portrait format. How do you when to use which format?
The terminology "landscape" and "portrait" gives us a hint. Landscape indicates a vast scene, which lends itself to a horizontal format. A portrait implies a picture of a person, and people are usually sitting or standing vertically. The bottom line is that the frame should compliment the form. In other words,
when cropping photos, match the orientation of the frame to the orientation of the subject.
In the first image, we have a portrait of a duck. The subject is oriented vertically, and it makes sense to orient our frame that way too.
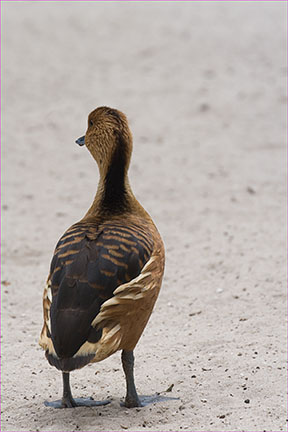
Portrait of a duck
© Julie Waterhouse Photography
In the second image, we have a pair of ducks. They fill the frame more naturally in a horizontal format.

A pair of ducks lends itself to a horizontal format.
© Julie Waterhouse Photography
What about when the choice is less obvious? Sometimes, with a landscape stretching out in front of you, there are good compositions to be had in either format. What do you think about the following photography composition?
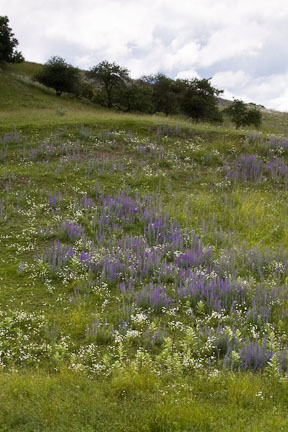
© Julie Waterhouse Photography
I see a horizontal line of trees, and a horizontal line through the grasses, and a landscape that runs horizontally! The image seems to be forced awkwardly into this vertical format.
Consider instead the following image from the same area. It works much better in a horizontal format.
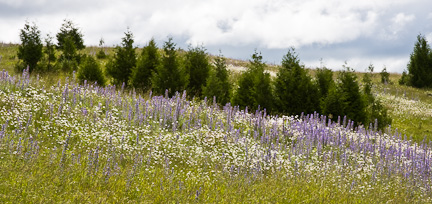
© Julie Waterhouse Photography
Frame Boundary
We have said that composition involves arranging picture element within a frame. This latter idea is significant. Where you place the boundaries of the image relative to the elements within the picture space contributes to the overall design of the image, which in turn underscores the image’s message.
The image frame itself can create shapes within the image. For example, one side of the frame may form the side of an equilateral triangle, or the edge of a rectangle. Learn more about this in the section on shapes.
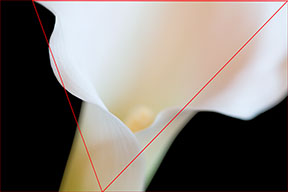
© Julie Waterhouse Photography
In the image of the lily, the edges of the outline form two sides on the inner triangle. It is the edges of the picture frame that form the third side. In addition, the frame edges form two sides of the triangles whose bases lie long the bottom picture edge.
Exactly where you place the frame interacts with the elements within the frame to create shapes.
That’s all for photography composition! Next, you may want to visit the Examples and Exercises page to check whether you’ve made sense of all the material.