Lesson 5: Reflectors and Diffusers
All photos and text © Julie Waterhouse, all rights reserved worldwide. No form of reproduction or usage (including copying in whole or in part, or altering of digital image and text files) is permitted without the express written permission of Julie Waterhouse.
Reflectors and diffusers can take your images from "good" to "great." They are the finishing touch that add a degree of professionalism to your final image. Don’t under-estimate the impact they can have! Reflectors and diffusers manipulate the light in your image, and as such, can change the overall look considerably. They are essential tools for the close-up photographer.
Reflectors
Reflectors are used to reflect, or bounce, light back onto your subject, thereby eliminating shadows. Reflectors are critical when doing close up photography using a single, directional light source (like a window). When light is striking an object from one side, the other side falls into shadow. With objects that have many surfaces at different angles, like flower petals, many areas of shadow may form. These are usually unflattering to the image. A reflector can bounce light into the scene to fill in those shadows.
Effect
Following are a few examples to show you just how significant the effect of a reflector can be.
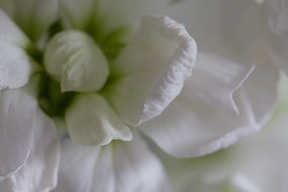
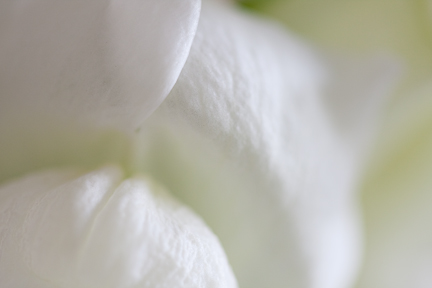
Without a reflector.
© Julie Waterhouse Photography
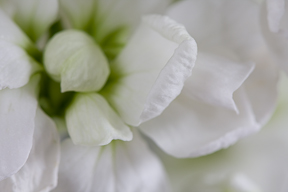
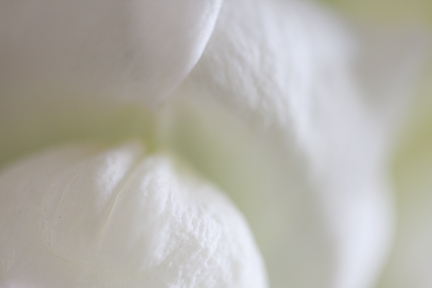
With a reflector.
© Julie Waterhouse Photography
A difference truly like night and day!
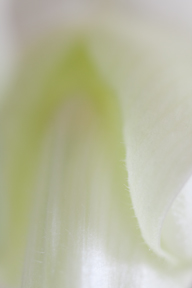
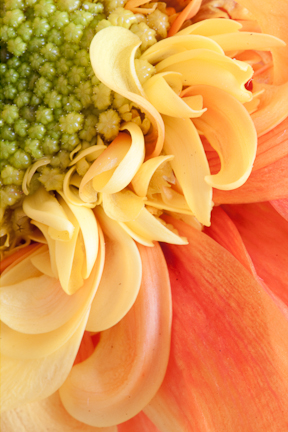
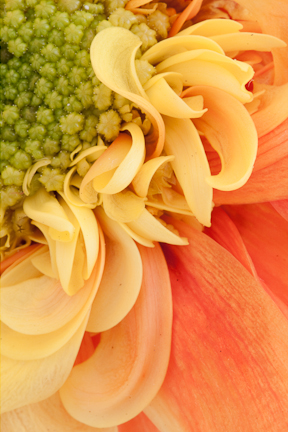
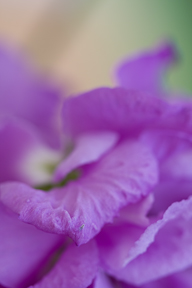
Without a reflector.
© Julie Waterhouse Photography
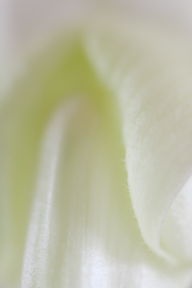
With a reflector.
© Julie Waterhouse Photography
In this case, the reflector has picked out a ridge in the petal that is virtually invisible in the image on the left. That ridge adds interest to the flower, and really "makes" the image.
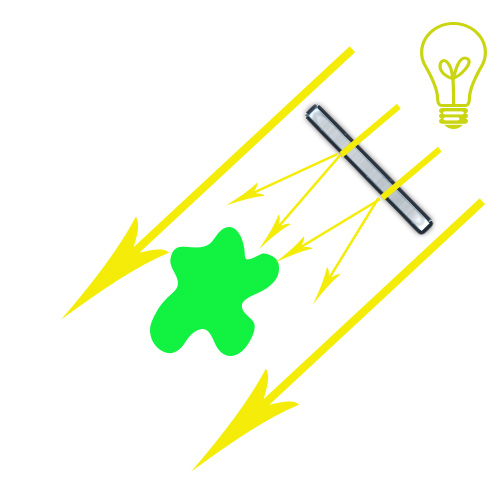
Reflector Position
The reflector should be placed on the opposite side of the subject to the light source. The idea is to catch the rays of light from the light source and bounce them back onto the object.
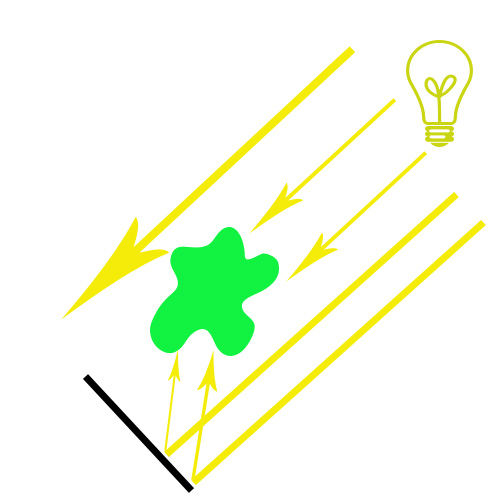
How a reflector works
© Julie Waterhouse Photography
It’s not enough just to hold up the reflector. Exactly where you position it, and at what angle, can have a huge impact on the result. The only way to know the right place is to experiment.
Technique 1: You can get a rough idea of where to place the reflector by looking directly at your subject while moving the reflector around. For exact placement, however, you need to look through the viewfinder while moving the reflector. The changes are too subtle, and the area affected is too small, for you to be able to appreciate the differences without looking at them through the viewfinder.
A black background is used to help you to see the differences in the following images. The changes are quite significant, and are solely the result of slight angle changes to the reflector.
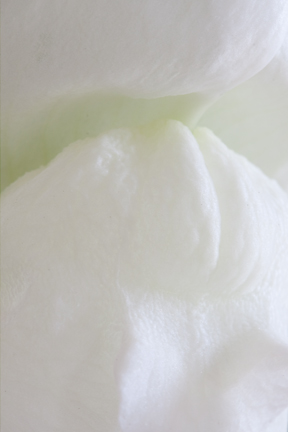
Reflector position 1.
© Julie Waterhouse Photography
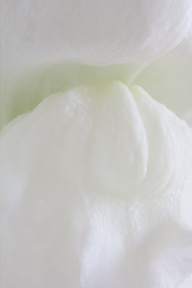
Reflector position 2.
© Julie Waterhouse Photography
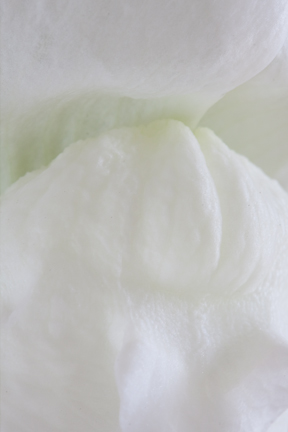
Reflector position 3.
© Julie Waterhouse Photography
Colour
Reflectors are usually white, silver or gold.
The colour of the reflector will affect the colour of the light on your subject. A white or silver reflector will reflect the light that hits it as-is, while a gold reflector renders a slightly warmer cast. Silver reflects more light than white, and will therefore produce a highlight with more contrast.
Without a reflector.
© Julie Waterhouse Photography
White reflector.
© Julie Waterhouse Photography
Silver reflector.
© Julie Waterhouse Photography
Gold reflector.
© Julie Waterhouse Photography
The effects of the white reflector are subtle, but noticeable along the left edge. The light is more even with the white reflector. The silver and gold reflectors provide stronger highlights. The gold one produces a warmer colour.
Reflectivity
Reflectors can have a shiny or a matte surface. A very shiny surface (like the shiny side of aluminum foil) tends to reflect bright, ‘contrasty’ highlights on your subject. If you want to mimic bright sunlight falling on your object, use a very shiny silver or gold reflector (gold will look more like late afternoon light).
If you prefer more even, soft, or diffused light, then a matte surface is better. A matte surface actually has a rougher texture than a shiny one, and therefore scatters light more unevenly toward your subject, resulting in a more diffuse reflection.
Buy or Build?
You can buy collapsible reflectors at your local camera store. There are 5-in-1 kits that cover all possibilities: white, silver, gold, a silver-gold mix, and translucent (a diffuser). The advantage of buying a reflector is that they are collapsible, making them easily portable for location shooting.
You can easily make your own reflector very inexpensively. The good news is that a home-made reflector is just as effective as one you buy in the store! Just glue shiny silver or gold paper (or aluminum foil) onto stiff cardboard or foamcore board, and presto! You have a reflector! You can use an uncovered piece of white foamcore for your white reflector. It will have a more matte finish, and produce a more diffuse light. You can get somewhere in-between the shiny and the matte by crinkling your aluminum foil first, before gluing it to the board. That will generate a more diffuse light, rather than the spotlight effect of flat foil.
The homemade reflectors are not as portable as the collapsible ones, but are great for studio use. You can make them in a variety of sizes.
Diffusers
A diffuser is another essential tool for the close-up photographer’s toolbox. Diffusers soften the light, and reduce glare and harsh shadows. They eliminate unattractive contrast, and even out the tonality in the image. This allows better colour saturation to appear, which can be especially important in flower photography.
Following are a few examples to show you just how significant the effect of a diffuser can be.
Without a diffuser.
© Julie Waterhouse Photography
With a diffuser.
© Julie Waterhouse Photography
In the image on the right, the diffuser has eliminated all the ‘contrasty’ highlights in the curly petals. The colours appear more saturated with the diffuser.
Here’s another example.
Without a diffuser.
© Julie Waterhouse Photography
With a diffuser.
© Julie Waterhouse Photography
In the right-hand image, the diffuser has eliminated the strong contrast. As a result, the colour of the petals is more visible, and more saturated.

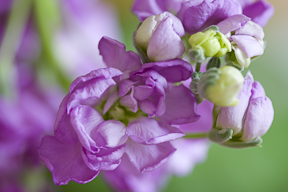
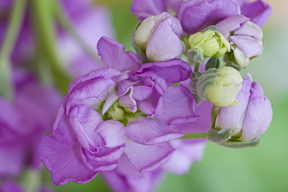
Without a diffuser.
© Julie Waterhouse Photography
With a diffuser.
© Julie Waterhouse Photography
How much contrast you want in the image is a matter of taste. The delicacy and colour saturation of the petals is more evident in the image where I used a diffuser. The colour temperature has changed too.
Diffuser Position
Unlike the reflector, the diffuser should be placed on the same side of the subject to the light source, between the light source and the subject. The idea is for the rays of light to pass through the diffuser. Not all the rays will make it through; the diffuser will block some. Also, the rays will be slightly scattered by the surface of the diffuser, producing a more even light.
How to use a diffuser.
© Julie Waterhouse Photography
Buy or Build?
Just like reflectors, you can buy collapsible diffusers at your local camera store. In fact, one usually comes in the standard 5-in-1 kits. The collapsible ones are useful for taking on location.
You can also buy a “PhotoBox” for studio shooting of small objects. These are great for close-up photography. The sides and top are made of white, translucent material, and they act as all-around diffusers.
For studio use, you can easily make your own diffuser. Take some heavy cardboard or foamcore, and cut out the centre, leaving a border like a picture frame. Over the hole in the middle, attach some translucent paper. You can buy heavy duty paper with a translucency similar to wax paper in most craft stores. You want something that some light will pass through, but not all.
Hints and Tips
In the following set of images, I walk you through the thought process I used when shooting this image. For every image I take, I vary the process slightly, but the idea is that I start with an initial image, and then make a series of refinements until I achieve the effect I want.
First I set my composition, and make sure I have eliminated all distractions. This in itself can be a lengthy process. Then I make sure I’m happy with my depth of field. Finally, I fine-tune the light with a reflector and diffuser, as needed.
Technique 2: Sometimes you have to be a bit of an octopus! I tend to hold the reflector in one hard and the diffuser in the other. My cable release goes in my right hand, along with the diffuser (my light source is on my right). I’m able to depress the shutter release with my forefinger, while trapping the diffuser between the cable release and my thumb. I find I have the control to make quick changes with this system, but you can also buy a stand to hold the reflector or diffuser, and free up some hands!
My step-by-step thought process while shooting:
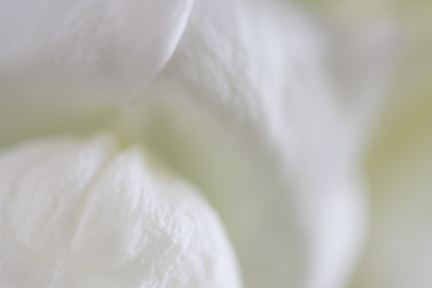
1. Initial composition.
© Julie Waterhouse Photography
1. Here’s my starting point.
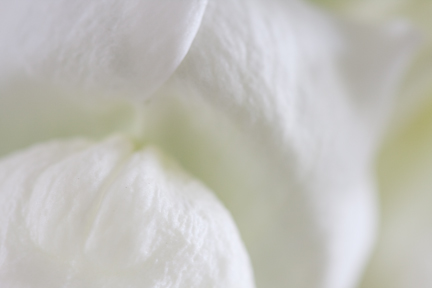
2. Recompose
© Julie Waterhouse Photography
2. I have recomposed to eliminate the dark distraction at the top by moving the camera down slightly
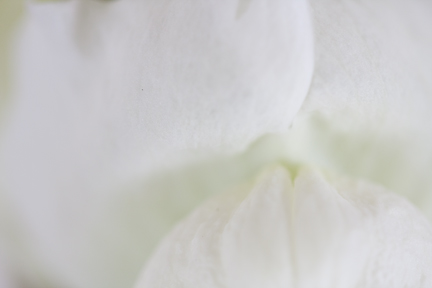
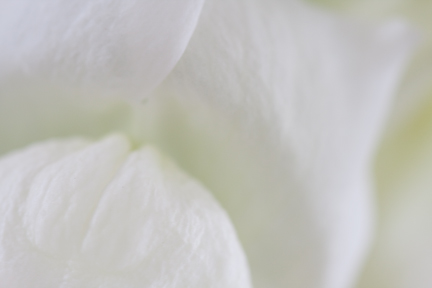
3. Silver reflector
© Julie Waterhouse Photography
3. Next, I add a silver reflector to fill in the shadow on the left side.
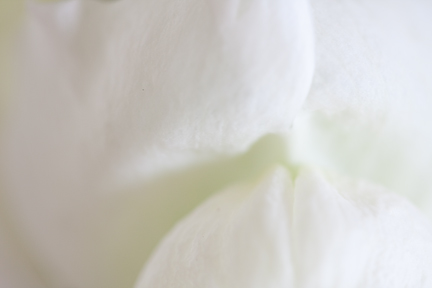
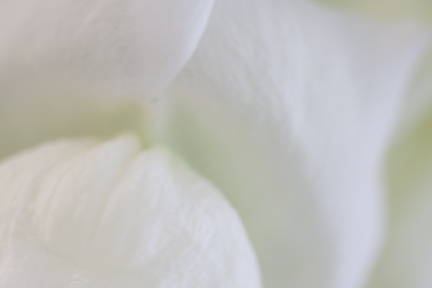
4. Increase the DOF
© Julie Waterhouse Photography
4. Next, I decide to increase the depth of field slightly from f/2.8 to f/4.5 to see more of the texture of the petals.
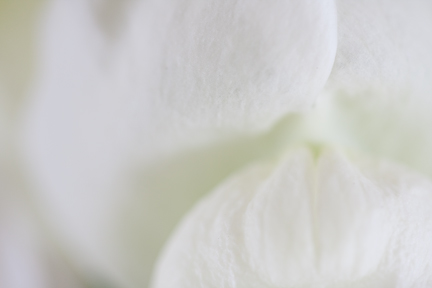
5. Diffuser
© Julie Waterhouse Photography
5. Now I add a diffuser to reduce contrast. Notice the brightness along the edge of the top petal is gone.
This actually takes away too much contrast for my taste. Except for the bright edge of the petal, I prefer the contrast in the image above, as it shows off the texture of the petals more.
6. Gold reflector
© Julie Waterhouse Photography
6. Now I experiment by trying a gold reflector instead of the silver (still with the diffuser). I don’t like the warm highlight since the rest of the image is “cool.”
7. White reflector
© Julie Waterhouse Photography
7. Finally I experiment by trying a white reflector instead (still with the diffuser). There’s not enough light for my taste. I prefer the silver reflector in this case.
Assignment #5:
1. Reflector. Make a pair of close-up images where you keep the same camera position and aperture, but add a reflector for the second image. Shoot your subject under lighting conditions that produce shadows on part of your subject. For the first image, use no reflector. For the second image, add a reflector to bounce light into the area in shadow.
2. Diffuser. Make a pair of close-up images where you keep the same camera position and aperture, but add a diffuser for the second image. Shoot your subject under a bright light (like the sun!) that produces a lot of contrast in the image. For the first image, use no diffuser. For the second image, add a diffuser to soften the light and reduce contrast.
3. Octopus Style! Make a pair of close-up images where you keep the same camera position and aperture, but add a reflector AND a diffuser for the second image. Shoot your subject under a bright light (like the sun!) that produces a lot of contrast in the image. For the first image, use no reflector or diffuser. For the second image, add a diffuser to soften the light and reduce contrast, and a reflector to bounce light in to fill in any shadows.
Put together everything you’ve learned so far, and upload images that are well-composed, with an appropriate depth of field, and free from distractions like intrusions, hot spots, black holes and mergers.
Upload two (2) images for question #1, two (2) images for question #2, and two (2) images for question #3, using the instructions you received in your welcome email. You will upload six (6) images in total. Remember to name your image files in such a way that it’s clear which question they address.
Congratulations! This is the last assignment! Compare your images from week one to those from this week. I hope you are able to see some improvement. Keep practicing everything you have learned, and have fun. Remember, I’m available to answer any questions you may have for the next two weeks, so feel free to email me for any clarifications of concepts or techniques.
Happy shooting!
All photos and text © Julie Waterhouse, all rights reserved worldwide. No form of reproduction or usage (including copying in whole or in part, or altering of digital image and text files) is permitted without the express written permission of Julie Waterhouse.