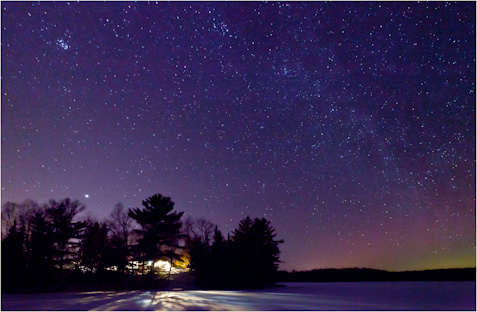
Have you ever wondered what shutter speed to use to capture star points, and not star trails? In this short video on digital night photography, Julie reveals the formula to use to calculate the maximum shutter speed you can use to keep those stars looking like points.

Spread the joy! Share today’s tweetable!
Video Transcript
Have you been curious about photographing the night sky, but you’re not really sure what settings to use so that your stars actually look like stars, and not lines in your photograph? Hi, I’m Julie from Ultimate Photo Tips, and today’s Two Minute Photo Tip is all about answering that question: what settings should you use on your camera so that you stars look like star points and not star trails?
Fist of all, you get star trails, meaning lines across your photograph, because the Earth is moving. If you leave your shutter open for a long period of time, the stars will move through your frame, and leave behind a trail of light. To avoid that, you need a short enough shutter speed that you stars come out just as points. So, what is that shutter speed, and how do we figure it out?

Digital Night Photography: Star Points
© Julie Waterhouse Photography
A good rule of thumb, if you don’t want to do any math, is that for a wide angle lens, 30 seconds is about as long as you can go. If you want to know the exact number, there’s a formula. It’s 600 divided by the focal length of your lens. This is for a 35mm format camera.
Maximum shutter speed (in seconds) so stars appear as points:
600 / focal length of lens (for 35mm format cameras)
300 / focal length of lens (for medium format cameras)
So let’s say you’re using an 18mm lens. 600 / 18 = 33.3. So with an 18mm lens, 30 seconds is the longest exposure you can use and still have your stars rendered as star points.
If you are going to be using a very short exposure like that, to get star points, that’s not going to give you a lot of light. You have to boost your light in other ways. That means setting an aperture that’s quite wide, and boosting you ISO as high as your camera can comfortably go without getting too much noise, so at least 1600, and possibly as high as 6400.
Time to try it out! Wait for the next clear sky, and get your camera out there — on a tripod, of course! – and try doing some digital night photography.
That’s your two minute tip for today! If you like this video, please like it, tweet it and share it with your friends. For more great tips, be sure to visit ultimate-photo-tips.com and sign up for my newsletter, where I share tips, ideas and inspiration that I don’t share anywhere else!
Happy shooting, and I’ll see you next time.